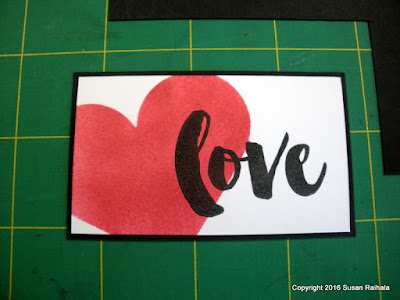
 |
| Supplies: panel to be matted, card stock for the mat, quilting ruler, self-healing cutting mat, craft knife with sharp blade |
WARNING: Precise cutting with a regular paper trimmer is great...as long as your trimmer is perfectly angled and marked. If it's even slightly off, things will never line up right. I prefer the control of using a quilting ruler and craft knife. If you've never used these tools before, BE CAREFUL. It's easy to slice your fingers, so always make sure they are firmly on the quilting ruler and not hanging over the edge as you cut. You have been warned!
 |
| Measure the panel you want to mat. As you can see, this panel is exactly 3 inches by 1.75 inches. |
 |
| Position the cardstock for the mat under the ruler at precisely 1/8" larger than the panel you want to mat. Use the grid lines on the ruler to make sure everything is at right angles. |
 |
| Check to make sure everything lines up BEFORE gluing the panel to the mat. Sometimes, as careful and experienced as I am at this, I mis-measure and have to re-cut. |
 |
| Here's the finished card. Yay! |
To make the stamped panel, I punched the heart out of a post-it note and angled it onto my panel. After sponging Brilliance poppy ink through the mask, I removed the post-it and stamped the sentiment in Memento Luxe black. I love how the heart looks velvet-textured, almost like it's been flocked. But it's just ink.
Hopefully, the pictures clarify the process, but if anyone still has questions, please ask in the comments, and I'll do my best to answer!
Supplies
stamps: Concord & 9th Map Love
ink: Brilliance poppy, Memento Luxe black
paper: StampinUp black, Papertrey white
accessories: post-its, heart punch (EK Success), sponge

great card! I cannot get even layers ever! If the layers are perfectly cut, which they often are, I adhere them crooked. ARGH
ReplyDeleteWonderful card Susan, will need to go get a quilting ruler and try thoug I suspect it will end up miss glued as that seems to be my major problem. One can but hopeit works.
ReplyDeleteI've only been waiting like FOREVER for this tutorial ;) - It's really to bad I am SO AWFUL at using a craft knife~
ReplyDeleteHave you ever tried the Perfect Layers tool? I use it alot, works well for me.
ReplyDeleteNever tried Perfect Layers before. Very cool!
DeleteAnother winner... LOVE this one, in fact. Isn't is awesome when an ink can also provide texture?!? I love this hobby.
ReplyDeleteYou are so good. I have always been afraid of craft knives. My paper cutter has to do my layers so not as neat as yours! Your today's post is awesome.
ReplyDeleteThank you, Susan, so much for the photo tutorial! I even have an Omnigrid (never used it! :D) I think it is abit thicker than the Perfect Layers cutting system and maybe I will have better luck with the Omnigrid. I have the Perfect Layers and inevitably 'under'cut one side every time (don't know why!). Tomorrow...I will dig out the Omnigrid and practice! Thank you, thank you!!!
ReplyDelete