Showing posts with label For Thanks. Show all posts

Friday, September 30, 2011

CraftyJC Challenge: Creative Simplicity

At the end of August, I received a lovely email from Jaya Christina, a paper crafter in India who has a beautiful blog full of clean-and-simple goodness. She explained how difficult and expensive it is for Indian crafters to get supplies. This is a common problem for crafters outside the United States, Canada, and Great Britain. I've had people in Australia, Spain, Brazil, Colombia, and Egypt tell me how tough it is for them to keep up with crafting trends and to get supplies.

We who can get everything a crafter might want--easily and affordably--have no idea how truly blessed we are.

Or are we really that blessed?

Think about all I've written lately about having so much stuff that it stifles my creativity, weighs me down. Jaya believes having limited access to supplies makes Indian crafters more creative, and I believe it. They do more with less, and they do it beautifully.

Jaya has a challenge called the CraftyJC Challenge, which "encourages and appreciates creativity--not just using fancy or expensive materials." When she asked if I would participate in this month's theme of Simplicity, I jumped at the chance to participate in an international celebration of simplicity.

Here's my card for the challenge.


It doesn't get much simpler than this. I used stamps from Hero Arts, stamped in Memento black ink and colored with three shades of Sharpie Markers. The bottom corners were rounded. I contemplated adding more (glitter, perhaps, or some Smooch), but decided this was perfect just the way it is.

Simplicity is beautiful.

I made a thank you card because I want to thank the world stamping community for providing so much inspiration. Few people in my "real" life stamp, yet I have so many stamping friends all over the world courtesy of the Internet. People take the time to share their arts and crafts with the world, and what an inspiration and gift to us all that generosity is! Thank you, Jaya, for giving us all the opportunity to connect and share.

See what you can do with less, and join Jaya and other Indian crafters in their Simplicity challenge. What a great World Card Making Day activity!

Supplies
stamps: Hero Arts
ink: Memento
paper: Papertrey Ink
accessories: sharpie markers, corner chomper

Friday, September 2, 2011

Ginkgo Gets Framed

A few large post-it notes to mask, a scattering of pearls, and Bob's your uncle.


What does that mean, exactly?

Nevermind. Or never mind.

Whatever. Or what ever.

Take your pick.

For those of us in the U.S. and Canada, it's Labor Day weekend, and I'm never in my right mind on a holiday weekend, especially when it's so blazingly hot all I can think about is an ice cold Mike's Hard Lemonade.

Be safe. Have fun. Peace be with you.

And if you want to shop this weekend, Mark's Finest Papers is having a nice sale on stamps, paper, and ribbon. So is Coffees of Hawaii, only their sale is on, well, coffee (20% off, plus free shipping on orders over $80 after the discount).  I get nothing for telling you these, by the way. Just trying to enable be helpful.

Supplies
stamps: Framed, Harvest Berries, Mega Mixed Messages (all Papertrey sets)
ink: Memento
paper: Papertrey
accessories: large gridded acrylic block, light brown half pearls

Friday, July 22, 2011

Just the After, and a Thank You

Easing back into blogging here; not sure how often I'll post over the next week or so, but I can't stay away completely. I want to thank you all for your wonderful words of encouragement...y'all are the best!!!

I was going to make this a before-and-after post, because I made an "meh" card first, then this one. But once I edited the photo of the "meh" card, I decided it was actually a "blech" card. You're spared the disaster.

You're welcome. Seriously.


This card's color scheme was inspired by a tea display at Barnes and Noble, with gorgeous gold and green tins alternated on a shelf. The colors just looked so summery I had to put them on paper. 

I inked the grass from PTI's anniversary set for this year using the summer sun marker from StampinUp, then I streaked green galore over it. Before stamping, I huffed it a couple of times (heavy breathing and stamping go together so well). The watercolor effect is so pretty!

On the blech card, I inked the sentiment with a pad, and it looked too crisp for the watercolors of the grass, so here I used the rich cocoa Memento marker. To stamp the butterflies I used a set called Spring Garden from Leave Memories and inked them with the green galore marker, huffed, and got a bit of watercolor effect. Love the crispness of the white with the bright watercolors!

I didn't actually earn the PTI anniversary set this year. I bought eleven sets (ARRGGHHH!!!) instead of the required twelve last year, so no set for me. UNTIL my friend Linda E offered to send me her extra! So, in addition to the card, here's a big

THANK YOU, LINDA!!!!

Friday, July 1, 2011

Would Someone Please Push the Pause Button?

I don't know why my life sped up this week, but I feel like someone pushed the fast forward button on it. It's been fun but exhausting.

Anyway. Today's card is the last I'll post with Grunge Me for a while...maybe. This one isn't grungy, though. It's crisp and clean, and as soon as I saw the stamp I knew I wanted to make a stylized flower with it.


Okay, the sentiment is grungy. But the card isn't. Pear Tart and Bahama Blue. A Memento Ink match made in heaven. To do this, I placed the stamp very carefully with the central point at the center of my gridded acrylic block. I placed a pencil dot in the exact center of the card and lined that up with the central circle on the gridded block, rotating the card for each stamp! So very easy to get precise placement with that FAB PTI gridded acrylic block!!!

And now for a non sequitur.

Happy Canada Day to my friends to the north! Y'all rock!!!!

And speaking of Canada, check out this ever so relevant little button the Canadian Jennifer Styles sent to me. Oh, she knows me so well! I'll bet y'all didn't know that the reason I have posted three OLWs in a row is because I don't want to get stuck with the odd numbers again. That really bothered me.


And yes, the lack of punctuation and capitalization on the button bothers me. "I have CDO. It's like OCD, but all the letters are in alphabetical order as they should be."

Now, I'm happy.

And tired.

I'm going to bed.

Sunday, June 12, 2011

Thank You Butterflies

This set of cards went to one of my boys' teachers for an end-of-year gift. The butterfly is from the SU hostess set my demo gave me for being such a long-term loyal customer. She's a sweetie! I thought the alphabet butterfly would be perfect for a teacher.


Monday, I'm driving home from visiting my sister in Maryland for the past four days. Many thanks to everyone who has been so good about leaving comments...please know that I appreciate each and every one of them, even if I haven't replied!

Supplies
stamps: SU (butterfly), Papertrey (sentiment)
ink: Memento
paper: Mark's Finest Papers
accessories: black half-pearls

Saturday, June 4, 2011

Variations on a Set: Dot Spot

Note: If you are reading this in email, don't miss the two posts below!

Today's two cards with Dot Spot feature the big flower in dramatic settings. On both cards, I combined lines with the design to balance all the great big roundness of the big flower.

First up, a pink and black card. I stamped the small dot circle in pink in the middle of the black and accented it with a bit of pink bling. The lines come from Background Basics: Retro.


Creating a center for this monster-sized flower is important for obsessive stampers. Leaving it empty is like not putting thread on a button. You could do it, but it almost always looks like something is missing.

Note that I said almost. There are exceptions to every rule. But you won't see an exception on this post, and you know why. Because I'm obsessive.

The next card is a 4.25" square card. The lines were drawn with a Memento marker and ruler. Blue and orange are complementary colors, meaning they are opposite each other on the color wheel. Any time you want a peppy, high-energy color combo, pick complementary colors in bright hues. Guaranteed happiness!


And speaking of color wheels, if you don't have one and feel a bit color challenged, I highly recommend getting one. Small ones are available at the big box stores for very reasonable prices. There are all sorts of tried and true color combinations that a color wheel can help you find easily.

Supplies
stamps: Papertrey Dot spot, Background Basics Retro, and one I don't remember for the friend sentiment; the thanks sentiment is from Hero Arts
ink: Memento
paper: Mark's Finest (top), PTI (bottom)
accessories: rhinestones, marker, ruler, corner chomper

Wednesday, May 25, 2011

The Return of the Colored Card Base

Yes, I have fallen off the use-all-my-colored-cardstock wagon. Sheesh. Just wait until you see tomorrow's post. White cardstock EVERYWHERE!

So I thought today I'd share the one colored-base card I've made in weeks. I like it. Lots.


This wasn't inspired by a single card but rather by a number of cards I've noticed in magazines lately that use the SU Top Note die (or similar) going off the edge of the card.

I, of course, do not have the Top Note die or any other die, seeing as I don't have a die cut machine, but a fun template for my Fiskar's Shape Cutter provided and clean and curvy substitute. This card uses product from four of my favorite companies: cardstock from SU and MFP, ribbon from MFP, sentiment from Hero Arts, and Dot Spot flower from Papertrey.

A Few Pieces of Business

1. I haven't forgotten about sharing my stamp index with you. I've just stalled in creating it. I will also do a quick tutorial on lining a punched border with colored cardstock and on modifying the PTI Framed stamps to accommodate wider sentiments. If there's anything else I've promised and haven't delivered or that you just want to see or know, pester me until I do it.

2. I've started a tab for my favorite products. It covers stamps right now, but I'll be adding a segment on cardstock, soon.

3. Y'all are the absolute best blog readers ever. I thank you for your support.

Tuesday, May 10, 2011

Card Creations and PTI's Framed

**SWOON**
Check out all those post-its. And that's just an initial run-through. There's TONS of clean-and-simple goodness in this magazine. I mean TONS!!! Also there are a few embellished cards that are simply begging to be CASified. It's been a while since I've felt inspired to do that. I've already used one idea from the magazine (Kelley Eubanks' bling idea on yesterday's post), and can't wait to dive into more! If you can get one, please do so as soon as possible!


For today's card, I'm giving you a preview of my (very simple) tutorial for using Papertrey's Framed set.


I stamped the frame, sentiment, and branch in Memento rich coffee ink, then added the outline leaves. I colored in the leaves with a pear tart marker. It looked a little blah, so I pulled out a Sakura Stardust clear pen and added shimmer to the leaves. LOVED that, so I took a scrap of green vellum, punched the butterfly, added Stardust to that, let it dry, and added it with a bit of olive Hero Arts bling.

Here's a little close-up that shows the shimmer a bit better. Click it to see it bigger.


Thanks for the input about tabs and labels. I'll leave the labels and add a tab with a list of all the tutorials, include acronyms on the FAQ, and list all the OLWs (though that might take a while!).

Supplies
stamps: PTI Framed and Out on a Limb, Clear and Simple sentiment
ink: Memento
paper: PTI white, green vellum
accessories: Sakura Stardust, rhinestone, post-it (to mask)

Saturday, May 7, 2011

Happy Mother's Day!

If you want to say "awwwww," please check last Friday's Post on my other blog to see my son's Mother's Day card to me. *sniff, sniff*

To all the mothers out there, Happy Mother's Day!

I found these cards, made last December, tucked in the wrong folder on my computer. I'm pretty sure they haven't been posted yet, so I decided to share them today. They show an excellent way for me to use up some colored cardstock. Must get to work on that!


Supplies
stamps: StampinUp Growing Green, Hero Arts sentiment
ink: SU white craft ink
paper: river rock, baja breeze, white
accessories: white embossing powder

Thursday, April 28, 2011

OLW51 Three of a Kind

When I read the OLW51 post Wednesday on Jennifer's blog, I collapsed in hysterical laughter. By entirely freaky coincidence, late Tuesday night when I could not sleep, I made a set of one-layer cards that vary the color but use the same stamps and layout. There are two each of three colors for a set of six. This is one of the options for Jennifer's OLW this week!

So there you are. I'm psychic.


These three cards are part of my NEW RESOLUTION. That's right. I finally settled on a follow-on for my Ues-Every-Image-Stamp resolution. Now, I'm going to use every set to make at least four different layouts. If the set has reasonable sentiments (as in, NOT kind thoughts, cherish, or puppies poop rainbows), I can only use those.

Doesn't that sound like a cool challenge? Well, it sounds cool to me.

The idea came to me when I realized how little I'd used this set (Papertrey's Paper Tray). It's a fabulous little set, one of the first Papertrey sold, and perfect for the graphic, clean style I love. So many sets have little stamps, like the line in this one, that aren't exactly images (more like elements) that I almost never use. Also, while most sentiments in the set are ones I don't use that often, the Happy Birthday, Thank You, and With Sympathy stamps just haven't been used enough.

The new resolution encourages me to make use of sentiments and those little elements in sets without mandating it. I don't want to be told what to do...even by myself, LOL!

So, I'm psychic and resolute. And I laugh at pears. Now you know everything about me.

Saturday, April 2, 2011

Quick Card Set

I needed a bunch of thank you cards for people at my church on short notice, so I pulled out two Papertrey sets: Simple Little Things (a limited edition anniversary set) and Everyday Blessings.


Add a bit of bling, round the corners with scallop scissors (tutorial to come on that), and you're done!

Happy Sunday!

Monday, January 24, 2011

Let's Mask!

For the next few days, we're MASKING!!! Specifically, we're masking backgrounds. I needed an excuse to use some big background stamps, and using these masks makes big backgrounds your CAS-style friends.

Consider today's card. The slightly weathered look of the balloon (Papertrey's Up, Up and Away) is enhanced by the fact that the edges of the masked cloud stamp (Hero Arts) are imperfect. I absolutely love how that turned out!


To make this card, I used the mask on the left (well, the one on bottom with the smaller opening).  


I've made all these masks with outer dimensions of 4.25" x 5.5"--the standard card size. This allows me to line them up perfectly on the card. It's worth taking the time to prepare these masks and store them for repeated use.

These masks are all made of very thin paper, but even so, there's often a bit of unevenness right around the edges when you stamp a big, solid background over them. The cloud stamp is a nice, crisp design, and uneven edges would ordinarily look like a mistake. But by pairing it with the distressed look of that particular balloon, a negative is instantly transformed into a positive. Squeee!

To make the card, I used temporary adhesive to attach the mask, and stamped the clouds over it. I placed my card and stamp on the floor (on a small piece of smooth plywood just for this, actually, since my floor has carpet) and stand on the stamp. I forget where I heard that tip, but seriously, it means a LOT less wasted paper from poor impressions.

The balloon basket was stamped directly onto the card, and the balloon itself was stamped on a scrap, cut out, and popped up.

Hope you like it!

Supplies 
stamps: Papertrey, Hero Arts
paper:  Papertrey
ink: SU bashful blue, real red; Memento black
accessories: dimensionals, mask

Thursday, December 30, 2010

Growing Green in One Subtle Layer

This time of year, after the glitz and glitter of Christmas, tends to be subtle for me. I made a set of simple, one-layer cards using all the images in StampinUp's Growing Green set. Here are two of the cards:


My goal was to create a long, loose border on the left third of the card to echo the elongated ascender on the h of the sentiment, which is from Hero Arts. The idea is to offer, visually, tall thanks. I was totally hooked on Baja Breeze and River Rock as a combo...very soothing and peaceful. But I think this would look awesome in bright colors, too.

My resolution from two years ago to use every image stamp I own has been so much fun. I'm not quite done, but I am focusing more and more on new acquisitions...most of the old stuff has been used already. I've even started putting new stamps in a basket to hold them until I use them. It's so fun to dive into that basket, make a bunch of stuff, and then add the stamps to my collection. It feels much more responsible than my previous method of hiding new stuff in my stash.

Do you have any tricks you use to USE your stuff?

Monday, December 27, 2010

Of Thank You Notes and Reorganization

Now that Christmas is over, it's time to think about thank you notes. Today, the boys and I will write a bunch of them. Some I've made over the last year are Christmas-themed, but those I've made in the last few weeks are not. Like this one, which uses a lamp from the Hero Arts Decorative Lamp set.


I can't remember exactly what green ink I used (maybe VersaMagic Tea Leaves...a dreamy green!), but the purply color is Boysenberry VersaColor, which is almost a dead ringer for SU's razzleberry. I wanted a table to ground the lamp but didn't want the bulk of a knot or bow added to what is already a double-dimensional card, so I wrapped SU dotted razzleberry ribbon flat around a popped panel. The lines of the grosgrain mimic the lines in the lamp shade, which is, of course, popped up. The card is 4.25" square, the sentiment is from PTI's anniversary set Round and Round, and the raised panel is 3" square.

Blithering about Reorganization...

I read Joan B's description of getting her supplies organized into her new Scrapbox on her blog here. This, combined with a revived confessional thread on SCS about people having too many supplies and a new thread by a woman who is putting herself on a stamp-supply spending freeze, and I felt uncontrollably motivated to reorganize my craft room. You see, my room's been looking cluttered lately, and my AR/OC self is feeling weighted down by that. I want to start the new year with a clean, tidy, organized room.

I spent about three hours yesterday going through stuff, condensing, and I'm not quite finished. You see, two years ago, when I resolved to use every image stamp I own (still ongoing and a very good resolution!), I also resolved not to buy any craft supplies I didn't really need. I focused my buying on replacing consummables I loved (self-adhesive gemstones, especially, and PTI white cardstock) and the occasional punch, as well as project-specific supplies. For stamps, I limited my spending to birthday and Christmas money, which, given the generosity of my family, has been more than sufficient.

As I used up some supplies, I didn't replace them. Ribbon, for instance. Two years ago, I used ribbon on virtually every card I made, so I bought it gleefully. (Unfortunately, now I don't use ribbon on cards nearly as often...though obviously judging from today's card, it's still a player.) Back then, I had 9 glass jars and two photo boxes full of ribbon. I mean FULL. Yesterday, without purging any ribbon at all, I eliminated the two photoboxes. The jars are still fairly full, but that's what I call progress.

My plan is to use up as much of my ribbon stash as possible and then start buying silk ribbon, which seems so much more sensible for cards as it results in flatter bows and knots. Unfortunately, until I use up most of what I have, I must resist the temptation.

I also have given away or donated a bunch of stuff in my quarterly purges. The result of all this fiscal responsibility was loose storage...drawers that were half-full and boxes that had just a few things left in them. Hence, the need to condense. Plus, the room had just become cluttered and messy, with random things stuffed in odd places.

It's already much improved, and I only have about an hour of work left. Obviously, any 12' x 10' room requiring over four hours to reorganize represents a serious mental illness. Okay, well, a mild one, at least. It also shows how incredibly blessed I am to have easy access to supplies and the means to purchase such a hoard without resorting to credit cards. It helps to have a husband with even more expensive hobbies so I need not feel guilty about all this stuff.

For two years, I've been heading in the right direction toward balancing possession and usefulness, and that's a resolution it seems I can stick to.

What are your crafting resolutions this year?

Sunday, December 19, 2010

You Don't HAVE to Color the Peacocks...

So, I was looking through Take Ten and saw some cards which used images stamped in black with accents of color by Glenda Giguere. The effect was striking, and I wanted to play with it myself. The Hero Arts peacocks set was perfect for trying the effect because it has outline images that are really pretty all by themselves, and with spots where coloring could add a little umph. So I made this:


Now, I'm not sure how I feel about the little ledge I have him standing on (good idea or not?), but I LOVE how the spots of Turquoise Stickles dress him up! It's uber sparkly in real life, though I'm not sure the picture does it justice.

Why not look for some outline images in your stash that you could stamp in black on white cardstock and then dress up this way...with a just a little glitter, bling, embellishments, or coloring? It's quick, easy, and has a fun graphic impact!

Many thanks to all who have wished me well after yesterday's rather whiny post. I'm still feeling icky, but my energy seems to be coming back. This, too, shall pass...hopefully in time for Christmas, which is looking to be white here in our corner of Ohio!

Thursday, October 28, 2010

Using Twinkling Paper in a CAS Layout: Part Three

This is the second day in a row that Blogger has not posted my scheduled post on time. My apologies to all who get Simplicity by email because this means a day's delay in delivery of the feed. Not sure what is going on since everything is scheduled correctly, but I am sorry.

Two questions came up in the comments from yesterday's post.

1. Susan asked if I stamped the images and then punched the squares, or punched and then stamped. Ordinarily, I do stamp first and then punch with the punch positioned upside down so I can see exactly where the image will be. This time, however, I punched first, expecting to leave the squares plain. Once I arranged them on the card (but before I glued them down), I decided the cards needed some random stamping to make them more interesting. As I stamped (over a piece of scrap paper), I thought about how the squares would be arranged and tried to place the images so they would look random and give a sense of movement when placed on the card together.

2. Sue asked why the Merry Christmas image looks better centered while the Happy Autumn looks better on the right. My best guess on this has to do with the fonts. Happy Autumn has initial caps (first letters capitalized) with very strong contrast in height from the caps to lower case, plus a descender of the letter y. By putting the sentiment off-center, that height variation is complemented by the asymmetry. If that sentiment were centered, I think it would look weird because the only "off" thing would be the capitalization because the squares are so evenly lined up.

I LOVE the font of that sentiment, BTW.

The Merry Christmas sentiment, on the other hand, is in all caps. Visually, it's very balanced, as are the squares. That makes it look better centered.

That's my theory, anyway.

Now to today's card....

I thought it would be helpful for new stampers to see a card as it develops, particularly how I place things and how I decide what to do next.

Let's start with the shimmery paper. I stamped my image (shown), then stamped the sentiment (not shown). I cut them out using a quilting ruler and craft knife. I like that because the quilting ruler is transparent with a grid. You can easily get even borders and make sure your stamping is straight if you cut this way.

I also make sure that the proportions of the cut panel will fit on a standard card. This stamped panel is 3" x 4.25"...leaving an even matte when you put it on a standard 4.25" x 5.5" card.


Here's the stamped and cut panel.


Next, I put the panel on an almost amethyst card, but it looked very blah. So I cut a black matte sized 1/8" bigger than the stamped panel (3 1/8" x 4 3/8"). The black really helps anchor the whole thing. So I glued it all down.


The card still looked a little plain, so he next step was to bling it up a bit. I added lavender Stickles to the berries on the branch and attached a sheer white ribbon knot with a glue dot. The shimmery sheer ribbon (from Michael's) is a perfect complement to the shimmery paper. And, well, Stickles doesn't need a reason, does it?


Congratulations to Simplicity reader Amanda B! She won 6 FREE STAMP SETS from Shady Tree Studio's new release. Dang, I wanted to win that one!

Tomorrow, I'm going to post my little chart for matting proportions. It's such a simple little thing to make yourself, but I use it all the time when I go more than one layer, so I thought I'd share.

Supplies
stamps: SU Garden Silhouettes, Hero Arts sentiment
ink: Memento black
paper: Arches hot press watercolor, SU black and almost amethyst
accessories: Twinkling H2Os, Stickles, sheer ribbon

Saturday, October 2, 2010

Thankful for You

Thank you all for playing along with Mary Dawn and me in A Week of Gratitude! Don't forget that the Gratitude Collection will be open for additions until the end of November. You'll be able to easily find the post by checking the Labels for Gratitude Collection. It'll take you right there. Winners of the give-away will be announced on Monday. Yippy!!!!

And today's card is for you.


Thank you so much for making Simplicity a fun place! Your encouragement, comments, emails, and cards keep me going. I am, indeed, deeply thankful for you.

MWAH!

Monday, September 27, 2010

A Week of Gratitude: Day 1

Six years ago, my pastor preached a sermon about how sad it is that Thanksgiving gets lost between the commercialism of Halloween and Christmas. That year, I noticed that Target had six aisles dedicated to Halloween. The Halloween aisles switched straight to Christmas. In fact, the only display specific to Thanksgiving was one end-cap, although there was one side of one aisle with dried fall arrangements and a row of hand-towels on another end-cap in Home Decor.

The pastor suggested several ways we reclaim Thanksgiving from the mad rush of Halloween and Christmas. My favorite won't surprise you at all. He proposed that we take special time each year to send Thanksgiving cards or letters to those who have touched our lives in some way.

Oh, yeah! I have been ALL OVER that one ever since. Each year, I send about twenty cards to random people from my address book, letting them know that I'm thankful they are (or have been) a special part of my life.

Mary Dawn and I had so much fun with Kraft Week a while back that we decided to do something else later. Later is here, and it's a Week of Gratitude! We're going to showcase cards expressing gratitude to various people. We'll have two prizes for random drawings from comments on both blogs, so the more posts you comment on, the more chances you have to win! The prizes are

1. An issue of Papercrafts Card Style (oh, how I love this special-issue magazine!) and two shadow inks.

2. A $25 gift certificate to Shady Tree Studio.

We're also challenging you to join in. We'll be adding an InLinkz button later this week for everyone who wants to take up the challenge to reclaim Thanksgiving for themselves.

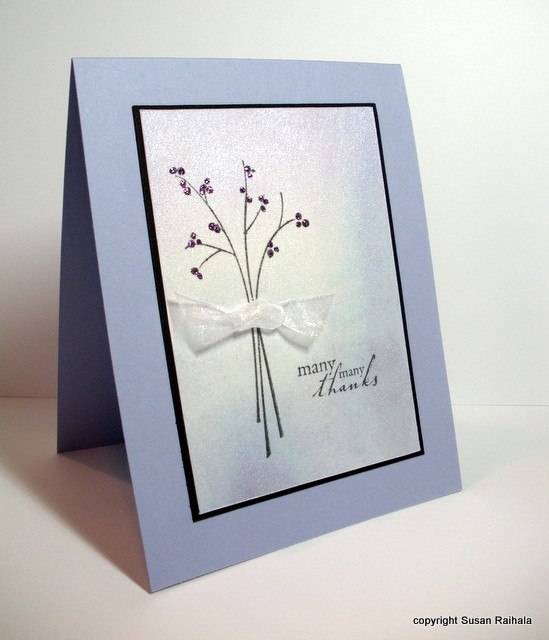
For my first card, I chose to go vintage with a shabby chic card. I KNOW!?!?! Where did THAT come from?!?!?!

 But I was thinking about my friend Deena, who was my best friend when we lived in Boise, Idaho. Deena and I shared all our secrets and supported one another each and every day. We worked side by side for three years, and then I moved to Rapid City.

And that was it. I tried to keep things going via email, but Deena felt like she had to write whole letters and just never found the time. We sent each other Christmas and birthday presents, just little things to let each other know we were thinking of each other. Then, she started sending the gifts late. Then, my last birthday and Christmas, she sent nothing at all, nor did she acknowledge my Christmas package.

Through another mutual friend, I know that she is fine and busy and doing well, but she has gone the way of so many civilian friends. You see, military folks are so transient, we learn to make friends very, very quickly. Our military friends understand the effort needed to stay connected over distance and DO SO, largely because we know that eventually, we will probably be reconnected at another base. There's hope of reunion, and that keeps the friendship close.

Civilians, on the other hand, lose hope, and friendships fade. To use a military metaphor, you fall off their radar scope, and their lives are too busy to put forth the effort of extending their scope's range to maintain long-distance friendship. They've got enough on their scope to keep them busy closer to home.

I used to be hurt and a bit bitter about this fact of life, but after it happened for the umpteenth time, I realized not to take it personally. FaceBook has helped to reconnect with these lost friends a bit, too. But Deena isn't on FaceBook. So I decided I'd send her a card this year.

It's vintage style popped into my brain when I was looking through Take Ten and seeing all the cards with text backgrounds. I thought the shabby style would reflect the friendship itself, a bit worn around the edges, a forgotten corner in the garden of life but still beautiful and precious nevertheless. The color scheme is soft pink and brown, a bit faded and washed out. But still pretty.


How-To Tips: First, I masked the vintage cream card base, and stamped Text Style on a long rectangle in Soft Wheat ink. Then I sponged some Pixie Pink VersaMagic to give the rectangle a bit more definition. After removing the mask, I stamped the large branch from Turning a New Leaf in Pixie Pink and the sentiment (from a fall PTI set from last year...can't remember the name) in VersaMagic Sahara Sand, a lovely light brown. The flowers were punched from a piece of stamped and distressed vintage cream (the paper was wadded up and flattened repeatedly, and sponged with Pixie). The centers of the flowers were punched from a piece of kraft that I repeatedly ran through a paper crimper (haven't used that in FOREVER!), poked holes into, and tied twine like a button. This keeps the card flat for mailing but adds some lovely softness and texture to it.

I hope you like this because OH MY GOSH, I do. It's wonderful when the style of a card reflects the message so perfectly and in such a personal and specific way for the recipient. I make hundreds of cards for other people every year...cards used by soldiers whom I don't know and will never meet and sent to people who are precious to them but unknown to me.

It's wonderful to make a card for someone I know and love. That's what makes handmade extra special, don't you think?

If you haven't done so already, check out Mary Dawn's blog My Pink Mexico for her kick-off to A Week of Gratitude!

Thursday, September 23, 2010

Inspiration Week: Day 4

Inspiration is all around us, if we open our eyes to see. I've already mentioned this week that I keep a little notebook in my purse to write down ideas I encounter as I go through daily life...my brain is a very busy place, and if I don't write things down those things disappear forever or until I happen to bump into them again, an act of serendipity I'm unwilling to trust. So I write things down, sketch them out using my primitive drawing ability that only I can understand.

But that's okay. It's recorded, and I can come back to it easily. Inspiration is largely private and personal. Where one person sees a really cool card, another may only see, let's say, a set of hotel toiletries:


These were in the bathroom of our hotel room in Madison. Aren't they pretty!?!? The colors and crisp, clean design caught my eye immediately, so I snagged them to take home to my craft room. No need to write them in a notebook.

After a number of failed efforts at duplicating this super-simple design that left me banging my head on the table in despair (don't let anyone tell you CAS is easy...it's NOT), I finally hit gold by using a limited edition Thank You set from Clear and Simple Stamps. BTW, I felt entirely justified in having a bazillion stamps while trying to figure this card out.


I love words (*snort*) so making cards with just words really appealed to me. But the sentiment I chose to put under the large Thank You (because the length of the line worked best) says from the heart. So I added a heart to the envelope flap. Because I could. (Note that these little cards are 4.75" x 3", to fit into the envelopes I already had.)

The second inspiration piece today was a photo in a decorating magazine. I really loved the color combination here, a sort of orangy reddish shade plus a very clear green (left to my own devices, I would have paired that orange-red with olive green...so NOT original or fresh!).


Adding cream and two shades of brown means this card has five colors on it. FIVE. Ordinarily, using five colors on a card would make me break out in hives, but with inspiration like this bedroom decor, it really was quite easy.


The stamps here are PTI's Floral Frenzy, which has this wonderful two-part sentiment, so I also stamped the inside of my card. I really need to start paying more attention to the inside of cards.


Today's Give-Away

Today is the grand opening of Shady Tree Studio. Nancy used to work at Cornish Heritage Farms, and when it closed, she felt the push to start her own company. Happy Day for all of us!!!!

I'll be placing an order today for Naturally Imagined (how appropriate!) to get started with Nancy's line. I love the look of that set and how easy it is to color...no large empty spaces to fret about blending. Plus, the sentiments are wonderful.

I'll also give a $15 gift certificate to Shady Tree Studio to one random lucky person who comments on this post by answering this question: Where, outside of nature and the world of papercrafting, do you like to look for inspiration for your stamping?

Friday, September 17, 2010

City-Slicker Card and a Happy Day

My card for today has a problem. Can you identify it?


What sort of leaves are on this apple tree? Could they be, dare I say, oak? Nature may never have made a tree that looked like this, but I sort of like it anyway. Besides, if I send it to a city slicker, she won't know the difference.

And yes, there are four apples. I tried three, but it really needed the fourth. I contemplated adding a fifth so I'd have the magic odd number, but that felt like too much. So four it is. Or should that be "four are it"? Whatever.

Look and see what I got Tuesday!!!


This was my first SU order out of the new catalog. Y'all may have some idea of the restraint I exercised in getting only two new colors. And two sets. And one punch. Oh the owl called to me, but alas, the butterfly won.

I hope I can play with all these goodies tomorrow. Life has conspired to keep me out of the craft room. MUST do something about that.

What new stuff have you bought recently that is calling to you to play?