Tuesday, August 30, 2016

Inspired by Soap Packaging, Part 1

It's always fun to see something on Pinterest and immediately feel inspired to make cards. This photo has so much goodness in it!

Source

The first card I made uses the layout of the beehive package (far left), with the cute little bees randomly buzzing around. In my version, they become red snowflake polka dots. Don't ask me why. My muse said red, so I went red.


Now, initially, I'd stamped the red dots onto the tree as well, as ornaments. But when you stamp red pigment ink over green dye ink, the results look rather drab and brown. So how to fix it? Well, I figured gold beads would make better ornaments; in addition, the panel needed some sort of border. With the gold metallic border, the gold beads look intentional rather than stuck on as an afterthought to cover a boo-boo.


I'm not bothered by the unrealistic color of the snowflakes (or, as I think of them, polka dots), but perhaps some literalists find it disturbing. If so, they might find tomorrow's card more sensibly colored.

Supplies
stamps: Clearly Besotted Tiny Trees, Hero Arts Holiday Greetings, My Favorite Things Party Patterns (the green blob)
ink: Memento love letter, rich cocoa; Ranger Archival leaf green
paper: Papertrey white
accessories: gold half beads, gold Prismacolor marker

Monday, August 29, 2016

Abundant Thanks

When thanking someone, it's good to be abundant, lavish, generous.

See?


Silver beads decorating a red tree. Silver border around the stamped panel...which isn't popped up on craft foam because the beads add enough dimension. Oh, yes. Abundant holiday thanks.

Do you make holiday-themed thank-you cards? It's a good idea, plus you get even more use from your holiday stamps!

Supplies
stamps: Penny Black (tree), Papertrey (sentiment)
ink: Hero Arts red royal
paper: Papertrey white
accessories: silver half-beads in two sizes, silver PrismaColor metallic marker, glue

Sunday, August 28, 2016

Stepping Up a Design

Y'all know that minimalist design makes my heart happy, but I also understand that my level of minimalism makes some people twitchy. So after I made today's first card, I decided to experiment with stepping up the design a bit. You be the judge.


First up, the super-minimalist card. Two birds in red, a sentiment in black...nothing else needed to convey the point. The red birds pop right off the card, and aren't they just lovely! They are from Clearly Besotted's Paired Up, and the sentiment is from Papertrey's Beautiful Butterflies.

I like this design. It's clean and minimalist and LateBlossom-y. But when I stepped it up a notch, several changes took place.


First, I changed the sentiment (an old PSX wood-mounted stamp) and placed the birds asymmetrically. This creates far more movement in the second design. That looked good, but my placement was slightly too high on the card for it to remain one layer, so I cut off the bottom off the front of the card, edged it with a black sharpie, and added a punched border.

The red card stock and ink actually match much better in real life, but the card stock looks darker in the photo.

I liked the first card well enough before I made the second one. There's just so much fun movement in the second one that really appeals to me. Still, if I were to give one of these two to my husband for our anniversary, I'd give him the first. When I asked his opinion, he really hated the "crap on the bottom of the second card," although he preferred the bird placement and sentiment of the second.

Which do you prefer?

Supply
stamps: Clearly Besotted, Papertrey, PSX
ink: Hero Arts intense black, red royal
paper: Papertrey white, StampinUp real red
accessories: border punch (Martha Stewart), black sharpie


Saturday, August 27, 2016

The Definition of Insanity, and Ink Issues Meet Crowd Sourcing

Y'all may have heard that the definition of insanity is doing the same thing over and over and expecting different results. Well, by that definition, I'm bat-guano crazy. Why do I keep buying layering stamps? Seriously?!?!? This time, results were slightly more satisfying than in the past, but basically, I'm not teachable.

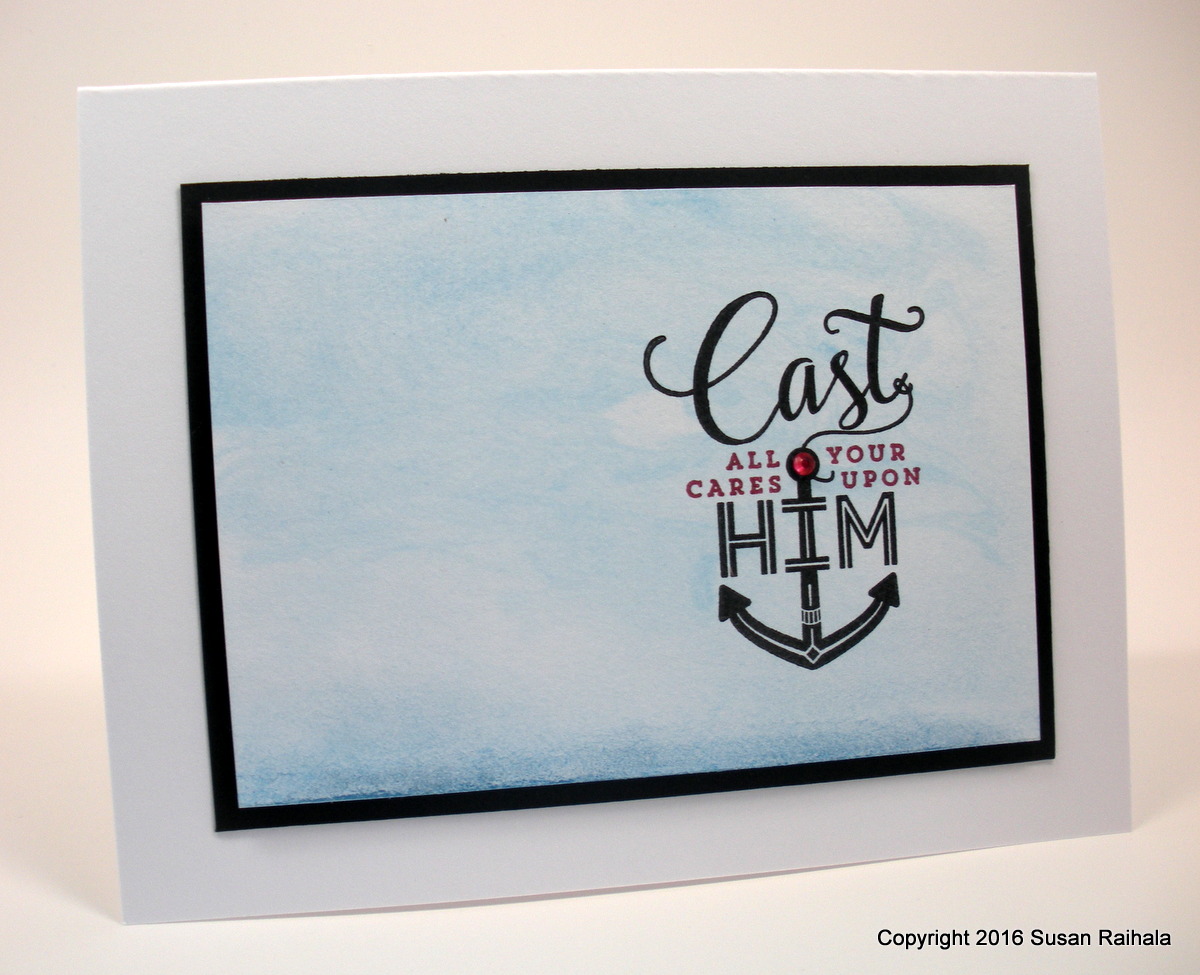
Here's my first card with Hero Arts Color Layers Seahorse set. There's so much to talk about here regarding product, but before we get off on my little whine-fest, please know that this layout was totally inspired by a card in the brand new Take Ten, page 27, by Shannon Slessman. Thank you, Shannon. Any and all failures of this card are mine alone. (But really, I love the idea and the layout!)


And before I get started, let me say that I know a MISTI would help with the layered stamping. I'm just not prepared to buy one for myself at this time. Perhaps for my birthday, along with a bunch of Ranger Archival ink. But we shall see.

The color layering of the seahorse and the other stamps in this set is somewhat easier than with other sets I've purchased, though as you can see from the close-up, it's not perfect. It is, however, good enough for government work. I practiced a lot before stamping this and found that stamping the middle layer first, then the light layer, and then the detail layer works best for me. The seahorse is also easier because it has an eye...which gives you a clear reference for the two darker layers.

The colors here are, from light to dark, Hero Arts tide pool, ocean, and deep ocean. Great combo!


Now, about deep ocean. This ink is from Hero's new hybrid ink line, and I'm not sold. The color is AWESOME, but the watercolor stripe above and below the focal-point panel was stamped with it, and as you can see, the image quality is appalling. It handled the details of the seahorse just fine, but on a large, solid block stamp, it's blotchy and uneven. And the stamp, from Papertrey's Watercolor Wonders, is a much used, well-seasoned stamp, so I doubt we can blame the stamp.

I have several colors of this hybrid ink (moss, green apple, tangerine, aquatic, and deep ocean), and they all do this. Very frustrating. So I got the idea today that it might be the paper. Papertrey white, which I use about 98% of the time. is porous and absorbent card stock. I tried to stamp deep ocean with the same stamp on Gina K's deluxe white, which is a coated card stock. The results were definitely better.


While not as even as one might hope, it's at least not blotchy and has good coverage of the paper. I imagine this hybrid ink would work great on coated paper with outline images or more finely detailed images. I need to put some time into exploring this. Any of you who've used the Hero Arts hybrids are encouraged to weigh in on this. Any and all help is very appreciated.

This points out one big issue with ink: individual results WILL vary. Ink performance depends on so many things...type of paper, amount of inking and pressure of stamping, humidity.

I'm going to do a post on some other inks that aren't working for me (trying to do a video post...not sure I'm cut out for video). Communication with manufacturers hasn't yielded any good ideas, so I'm going to throw it out there for you all. I KNOW I'm not the only person having problems with some of these inks, and I also know that there are people out there having good luck with them.

Perhaps we can bring these two groups together and troubleshoot the issues via this here blog o' mine.

This post has been a tad whiny, and I don't like that. There are much better things to whine about in the world...human trafficking, children going to bed hungry, war, genocide, racism...etc. Layered stamping, ink, and image quality rank pretty low on the list.

Speaking of which, my husband just told me that you can buy flamethrowers and napalm online. I'm filing this tidbit of knowledge under "Signs of the Coming Apocalypse."

So let's end on a happy note. Here's my haul of stamps from orders placed earlier this week. Because I love the smell of new photopolymer in the morning.


Supplies
stamps: Hero Arts Color Layer Seahorse, Papertrey Watercolor Wonder
ink: Hero Arts
paper: Papertrey white
accessories: rhinestones


Thursday, August 25, 2016

Another Wreath Card for Halloween

FYI, I only make five Halloween cards per year. They go to my two boys, two nephews, and one niece. Only three this year are worthy of the blog (the other two are fine but not particularly creative), and tonight's card is the third I'm willing to share. Aren't you relieved.

Here's the card that's going to one of my sons this year.

Card Size: 6.25" x 3.5"

The tall, narrow profile of this card is perfect for offsetting the wreath. The sentiment and wreath placement creates both balance and movement for the eye, even without a visual triangle.


The wreath, from Papertrey's A Wreath for All Seasons, is stamped in Hero Arts Intense Black and Memento Tangelo. Then, I covered random spots with a dark orange Smooch, which adds some shimmer and depth to the berries on the wreath.

I love using non-Halloween stamps to make Halloween cards!

Supplies
stamps: Papertrey A Wreath for All Seasons, Clearly Besotted Happy Days
ink: Hero Arts, Memento
paper: Papertrey white
accessories: Smooch

Wednesday, August 24, 2016

Halloween-y Wreath

My niece is 16 years old, and that's such a hard age. You're not really grown up, but you're certainly not a kid. You're probably too cool to go begging on Halloween...and also too cool to hand out candy. You want to be treated like an adult, but inside, you know you're not.

Even if it were possible, there's not enough money in the world to entice me to be 16 again.

Every year, I send my niece and two nephews each a different Halloween card. This year, I wanted Rory's card to be more grown up and sophisticated, rather than something cute with witches and ghosts and goblins, so I pulled out Papertrey's A Wreath for All Seasons set and had fun.


The charcoal gray and dark orange colors speak to sophistication, and the card doesn't look too Halloween-y. Inside it is stamped with a simple Happy Halloween sentiment so the point gets made, and I hope Rory feels more grown up receiving her card this year.

The arrangement of gray and orange rhinestones was carefully planned to try for a good balance, and it seems to have worked. The gray and orange turned out even more sophisticated than I expected, but wouldn't it would be fun to experiment with other colors as well? For a more Halloween-y look, I might try purple, lime green, and orange.


Wow. It says something about me that I'm loving the word Halloween-y. Not sure what it says, but it says something.

What colors do you prefer on Halloween cards?

Supplies
stamps: Papertrey A Wreath for All Seasons
ink: Hero Arts charcoal
paper: Papertrey white, terra cotta
accessories: rhinestones, Martha Stewart bow punch, glue

Tuesday, August 23, 2016

Halloween in August

It's less than six weeks to October, which is the month of Halloween, so it's not too early to get started on Halloween cards. Right?

Perhaps I'm delusional and have jumped the gun on this one, but nevertheless, Halloween cards are what I have to post for the next few days.

I love three of the Halloween cards I've made. LOVE them.

I never say that about Halloween cards. So here's the first, which includes actual sponging and masking. If you get some inspiration to get a head-start on Halloween, so much the better.


This large tree stamp from PSX is generally hard for me to work with, seeing as it leaves little space for white space. This purple panel, however, creates a spooky scene while still allowing plenty of white space, and my nephew will love it!

The card has only two layers. The sponged panel is edged with a black Sharpie marker rather than matted on black card stock. It's cleaner that way. Without the edging, though, it looked rather blah.

Now, see? Halloween in August isn't so bad.

I hope.


Supplies
stamps: PSX tree, Clearly Besotted Happy Days
ink: Memento Luxe black, Distress ink, Kaleidacolor
paper: Papertrey white
accessories: circle punch, post-it, black Sharpie marker

Monday, August 22, 2016

Giving Thanks for Fall Colors and Stickles


Y'all know how I feel about Stickles. A stamper can never have enough.


While I had Simon Says Stamp's Giving Thanks set out, I decided to play around with Papertrey's terra cotta ink, which is my replacement for Ancient Page henna, which is, alas, no longer available. In the process, guess who learned that Stickles paprika matches the terra cotta really, really well?


*raises hand*

A copper metallic ink border gives some needed outline to the panel (believe me, I tried it without and it looked blah).

What's your favorite color for autumn leaves? Have you found an ink that captures that color? My favorite is a blazing orange that, when back-lit by the sun on a blue-sky day, looks as if the tree is literally on fire.

Of course, it isn't literally on fire. It just looks that way. If it were literally on fire, I'd have to dial 911 and pray the fire doesn't spread. But every time I see that particular shade of orange, I ask myself, "Is that tree on fire?"

And no, I've never found an ink that does that particular color justice.

Supplies
stamps: Simon Says Stamp Giving Thanks
ink: Papertrey terra cotta, Hero Arts cup o' Joe
paper: papertrey
accessories: Stickles (paprika), craft foam, glue, copper metallic pen


Sunday, August 21, 2016

Kicking It up a Notch

I pulled out Simon Says Stamp's Giving Thanks set and started playing around. Karen's Card Shop, our church's fundraising card shop, needed some thank-you cards.

My first effort was extremely me, meaning super clean and simple.


Of course. A fun, stretched-out sentiment that serves as a perch for a single grateful bird makes for a perfectly minimalist card.

But then, I decided that stretched-out sentiment also might make a lovely ground for the tree in the set, so this autumnal card evolved from the first.


Still clean and simple, but a bit more colorful. There's also nice movement of the eye around the card, thanks to those tiny leaf stamps sprinkled around.

I'm longing for autumn right now. You'll be seeing more fall cards in the next few weeks, including my recent flourish of Halloween cards. Ordinarily, I don't enjoy making Halloween cards, but I got on a roll and the results surprised me.

Apologies in advance for those who don't like seeing new seasonal stuff too soon, but autumn is my favorite season. I'm getting excited! Besides, maybe my early-bird efforts will spark your creative energy. That's my hope.

Supplies
stamps: Simon Says Stamp Giving Thanks
ink: Hero Arts
paper: Papertrey
accessories: none

Saturday, August 20, 2016

IC559...In Celebration of Coffee and Books

As soon as I saw this week's Inspiration Challenge #559 at Splitcoast, the idea for this card popped into my head.

Yay!!!!

Lydia (UnderstandBlue) is the host this week, as Audrie takes a break, and she linked to EcoCycled on Etsy for the inspiration. As a fellow English major, Lydia is a fan of words just like I am, and she found the EcoCycled idea of making art on top of book pages inspiring. So did I!


Of course, I needed more white space on the page than the inspiration photos allow, so changing the scale of the "book page" worked for me. My little panel (1 5/8" x 2 7/8") looks more like a collage than most of the inspiration photos, but the overall effect is similar.


To create my faux-page art, I used Papertrey's Text Style, stamped repeatedly and offset with each stamping so the words wouldn't so obviously repeat. The ink is Hero Arts charcoal, which eliminated the harshness of black but still looks bookish. The mug, from Papertrey's Warm Happiness, is stamped in Memento Luxe rich cocoa and the steam curls are in a Colorbox chalk light brown for added warmth.

I actually contemplated stamping some color in the mug (there's a stamp for that), as so many of the inspiration photos have color in them, but decided to let the letters carry all the color. Glad I resisted. It simplifies the whole thing, and there's already a lot going on in such a small space.

The words were stamped with an old StampinUp alphabet set whose name has been lost over the years. The ink is Memento Luxe rhubarb stalk, which gives a nice pop of color amidst all the neutrals. The word panels were cut by hand and popped up on little square dimensionals.

I also wanted the text to relate to the images, even if it was subtle, so when I selected where on my prepared text panel to stamp the coffee mug, I tried to make sure words like "delights" and "joyful" were conveniently centered near the top of the mug. I didn't plan the fact that "happiness" shows between the coffee and book panels...that little bit of serendipity made me giggle with glee.

Ordinarily, I can point to a specific inspiration photo that I worked off of to create my card, but this time, I just took the general idea of the whole site and made it my own. But here's an example of the book theme being used, and here's an example of a line drawing over the text without color.

This was so much fun, and there are countless ways you could play off a text background or use an actual page from a book as your background. Click on over to the challenge and play along, if you feel so inclined!

Supplies
stamps: Papertrey Warm Happiness, Text Style; StampinUp alphabet
ink: Hero Arts charcoal; Memento Luxe rich cocoa, rhubarb stalk; Colorbox chalk light brown
paper: Papertrey white
accessories: dimensional squares


Thursday, August 18, 2016

Playing with Altenew

Note that Altenew sent me the two sets I'm using today gratis, and I thank them for that!

Botanical Garden from Altenew has such a wonderful vibe, doesn't it? It's feminine and loose but also elegant. Love it!


To design this card, I started with a long strip of scrap white card stock. After stamping the three butterflies in a visual triangle of Memento Luxe Morocco, I filled in the rest of the strip with the branch and flower using Impress Fresh Ink ginger. As I tried to figure out how to add a sentiment, I realized there was a perfect blank place for the hello stamp from Sentiments and Quotes.


Now of course my first instinct was a white-on-white layering but it looked off, somehow. So I rummaged in my scraps of colored card stock, which were feeling so neglected and lonely. The Papertrey terra cotta is a few shades darker than the Memento Luxe Morocco, lending a strong visual anchor to the design. Don't you love it when three colors from three different companies work so well together? Of course you do.

The design is strongly oriented to the vertical, but the sentiment, small as it is, gives a touch of horizontal. The contrast gives the sentiment more visual weight than it should have given how small it is. The Memento Luxe espresso truffle ink reinforces that.

And it was totally serendipitous, not planned at all. I'd rather be lucky than good any day!

Supplies
stamps: Altenew Botanical Garden, Sentiments and Quotes 
ink: Memento Luxe, Impress Fresh
paper: Papertrey white, terra cotta
accessories: none

Wednesday, August 17, 2016

It's Not Hoarding If It's Books

I haven't talked about my bibliophilic tendencies lately because, let's face it, this is a stamping blog, not a book blog, and we English-major types can get a little carried away on our favorite subject and bore the dickens out of normal people.

Dickens. Get it?

Anyway, I'm a reader and love books of all sorts. And no, I'm not a snob about paper books. If you have an e-reader (mine's a Nook tablet in a delightful liturgical-red leather cover that's very satisfying), that's fine with me. If you only read printed books, that's fine, too. To each reader, his/her own preference. The world is big enough for us all.

It wasn't until I started watching Fixer Upper that I really thought about what books look like on a shelf. Joanna Gaines is a genius with decor, but she tends to cover books with neutral wrappers and use them as decorative accents. While the effect is charmingly coordinated and certainly appeals to my minimalist, monochromatic tendencies, the neutrality and anonymity of the books bothers me. What's inside those covers? Are they good books or mediocre books or prurient books or fiction or nonfiction or old books or new books? Who wrote them?

Those linen wrappers hide all that makes a book special. It feels wrong.

In a world where children are starving to death, I'm bothered by this. Seriously?

Anyway, My own bookshelves are not color-coordinated and artistically arranged. They are organized by subject, and the subjects include medieval literature (biggest section), medieval history (second biggest section), medieval art and architecture, Christian, classic novels, poetry, mysteries, series (including Jan Karon's Mitford books and Alexander McCall Smith's No. 1 Ladies Detective Agency), autism, miscellaneous non-fiction, and so on. This means I know just where to go to find a book. In seconds, that lovely tome is in my hand, open and useful.

I'm not so obsessive-compulsive that each section is alphabetized by author or title. But still. It's easy to find books in my house.

Did you know that during the middle ages, libraries organized books by size? Yep. Can you imagine searching chests to find a folio-sized book of Ptolemy's Almagest or a quarto-size copy of Bede's Ecclesiastical History of the English People or an octavo-size copy of Chaucer's Parliament of Fowls? It sounds like a lengthy treasure hunt compared to navigating the Dewey Decimal System or my own shelves.

Anyway, when I decided to make a card for my friend who started our book club, I made the shelf more reminiscent of my practically-organized shelves rather than Joanna Gaines' artful shelves or the uniform sizes of the library at the Abbey of Montecassino. Although I added a plant...just for fun and because my friend is quite the gardener as well as a bibliophile.


Now, aren't you glad I rarely talk about books on Simplicity?

Of course you are.

Supplies
stamps: Papertrey All Booked Up (sentiment), Simon Says Stamp To Thine Own Shelf (everything else)
ink: various pigment inks
paper: Papertrey white
accessories: none

Tuesday, August 16, 2016

In Praise of "Collecting"

While SOME stampers have been known to over-buy and hoard supplies, sometimes never using them at all, I think it's important to acknowledge and praise the efforts of those of us who "collect" supplies and turn around and actually USE them.

Because...go, me!


This card contains dots of Stickles from five different bottles. Now, I've never counted all my Stickles bottles, but it's easily upwards of 20. And it was delightful to have just the right shades to match the inks in the Kaleidacolor Caribbean Sea pad.

I have upwards of 12 Kaleidacolor pads, with five colors on each pad. Clearly I do not have enough Stickles.

This may or may not be how we stampers get into trouble.

The end.

Supplies
stamps: Papertrey Good Times, Wet Paint
ink: Kaleidacolor Caribbean Sea, Memento Luxe black
paper: Papertrey white
accessories: black Sharpie marker, ruler, Stickles

Monday, August 15, 2016

Ink Performance and Detailed Stamps

It's a given that with detailed stamps, ink matters. A lot. But it appears I've not thought much about that lately, and when I stamped the first version of this card, my immediate response was, "Yay, looks great!" But five minutes later, it looked like this.


The inks here are Hero Arts red royal and pool. It's pretty clear that the pool did a lovely job for the holly and Christmas stamps, but the Happy isn't so happy, now, is it? Generally speaking, I like the performance of my Hero Arts inks (and the colors are fabby!), but this was a disappointment.


So I pulled out my closest colors in pigment inks (Memento Luxe love letter and VersaMagic Aegean), which normally work great with detailed stamps. The shades aren't as nice, I think, as the dye inks (love letter is candy-apple rather than rich red, and Aegean is more gray than blue), but the impression of Happy is certainly crisper.


The problem with pigment inks is that the thickness of the ink can fill in the fine details (you see a bit of that on the H in Happy). I recently bought a couple of Ranger Archival Inks, just, you know, to try out. (No, I don't have a problem. Do I?)

Anyway, here's the Happy stamped in Archival leaf green.


I was VERY impressed with how the Archival ink preserved so much detail. Apparently, these inks have an oil base, which allows them to keep detail better than other dye inks, which are water-based.

My 50th birthday is this year. Perhaps the full line of Ranger Archival Inks is in my future....

We shall see. A girl never can have enough ink. Right?

Supplies
stamps: Clearly Besotted Happy Days, Papertrey Holly Jolly
ink: listed above
paper: Papertrey white
accessories: rhinestones, craft foam, glue, silver metallic marker


Saturday, August 13, 2016

Using Line to Create Movement

Oh, lawsy daisy!

That's what my very southern grandmother used to say when she really wanted to say something else but couldn't in front of her two granddaughters.

Oh, lawsy daisy!

After ruining a lot of expensive paper and much exclaiming of lawsy daisy, I decided to make my mother-in-law a get-well card. A kind muse whispered in my ear, "Create movement with line."

That muse could have showed up sooner, is all I'm sayin'.

Then this card happened.


The branch comes from Papertrey's Turning a New Leaf and has a gently curving stem that was perfect to illustrate the point of line creating movement: your eye follows the line that flows under the sentiment. The branch is stamped twice, with the awkward intersection covered by the raised panel.

I positioned the branches to move up and to the right in order to portray moving from sick to well as a rising action. It's saying my mother-in-law has a hill to climb after surgery, but she can do it! The sentiment is positioned to the right also to emphasize the rising, optimistic movement.

The focal-point sentiment is static, level, stable. The line of the branch shows growth, movement, progress. The tension between the two is nice, I think. I particularly like how clean this is...just paper, ink, two colors, two white layers, great pop of color.

Why, oh, why didn't that muse show up sooner?

Lawsy.

Supplies
stamps: Papertrey 
ink: Ancient Page amethyst, Memento Luxe black
paper: Papertrey white
accessories: glue, craft foam

Friday, August 12, 2016

Christmas Thanks

Every year, I try to make enough Christmas-themed thank-you cards for our needs. It's easier to find a simple design and make a few rather than to make each one unique, and today's design is perfect for this.


These three sizes of stylized poinsettias come in the Ornamental Style set from Clearly Besotted. They're designed to fit inside the three ornament stamps in the set, but these little stamps are actually incredibly versatile. Lining them up is simple and clean, and points attention directly at the small sentiment (from a Clearly Besotted sentiment set).

As you're stamping this weekend, look at the small accessory stamps in different sets and challenge yourself to use them in a different way than intended. It's fun!

Supplies
stamps: Clearly Besotted
ink: Memento Luxe love letter, Impress Fresh Ink mojito
paper: Papertrey white
accessories: rhinestones

Thursday, August 11, 2016

Breathe

Tuesday morning, I had an MRI and was reminded why people have nightmares about waking up in coffins. Thankfully not suffering from claustrophobia, I still felt weird trapped in the loud and cramped machine for 25 minutes.

Deep breathing, however, made 25 minutes feel more like ten minutes. It's a relaxation technique that I learned last winter, and if you've never practiced it, I highly recommend it. I didn't twitch, cough, itch, or otherwise screw up the scan. Yay, me! (And the MRI was for nothing serious, so no worries.)

Speaking of breathing, when we were in Hawaii a few years ago, we took a dolphin cruise that included a stop to snorkel over a gorgeous reef. During the safety briefing, the captain said that he'd been asked how people can breathe under the water, and his response was, "You can't." He's right. That's why the sentiment on today's card has its "head" sticking up out of the water.


Raised panel is 2" x 3.25"

To make these waves, I used a new ink pad (Ranger Archival aquamarine) that I truly love (will be buying more Ranger Archival ink pads!) combined with Hero Arts soft pool. The stamp is an old, old, old Hero Arts swish shadow stamp.

We're all floating around in the ocean of life, keeping our heads above the waves and breathing deeply of wonderful air. So remember to breathe...and to be grateful for those deep, relaxing, cleansing breaths that get us through awkward situations.

Supplies
stamps: Hero Arts (shadow), Simon Says Stamp One with Nature (sentiment)
ink: Hero Arts soft pool, Ranger Archival aquamarine, Memento Luxe black
paper: Papertrey white
accessories: craft foam, glue

Wednesday, August 10, 2016

Blingity

This card looked good before I blinged it. Now, it makes me giggle with Christmas glee.


Card size: 3.5" x 6.25"


Silver and red are a match made in heaven for Christmas. The silver calls to mind sleigh bells, frost and snow and all things icy, and tinsel. The red evokes warmth and velvet and poinsettias. The combination makes me so very happy!


Every Christmas, I intentionally choose wrapping paper in a different color scheme...silver and gold, red and green, green and silver or gold or white, red and silver or gold or white. One year, I used white paper with red ribbon. This might make me sound more matchy-matchy than I am. My tree is nowhere near coordinated (nor are the other decorations), and since I always have leftover paper to use from the previous year, gifts are not truly coordinated under the tree, either. But it's exciting every year to pick a different color scheme.

Do you have a favorite color scheme you use each holiday or do you switch it up? Are your holiday decorations coordinated, or do you just get whatever makes you happy, regardless of color? Inquiring minds want to know!

Supplies
stamps: Clearly Besotted 
ink: Delicata silver, Memento Luxe love letter
paper: Papertrey white
accessories: corner rounder, rhinestones

Tuesday, August 9, 2016

Onions Have Layers

...and so do cakes. Onions are fine, really, but when it comes to birthday layers, I think I prefer cake.


These cards came out of experiments with this color combination on Pinterest, but the most fascinating thing about them is how the yellow changes between the cards. It's exactly the same ink (Hero Arts lemon yellow), but notice how much greener it looks on the blue card than on the orange-and-red card.

It's not surprising, really, that it would look different, but it is definitely noticeable.

Do you prefer one color combination over the other?

Supplies
stamps: Papertrey
ink: Hero Arts, StampinUp
paper: Papertrey
accessories: none

Sunday, August 7, 2016

Fun with Color and a Lesson in Weight

Today's two cards use the same stamps and layout but feel very, very different because of the color schemes, both of which were inspired by Pinterest.

First up, a funky gray, dark red, and yellow color scheme suggested by this pin. The colors are unexpected, dramatic, and even a touch sophisticated.


The second version plays up cool blues and purples...an analogous color scheme (colors side by side on the color wheel) that is peaceful, harmonious, and feminine. It was inspired by this pin.


Now, this layout works pretty well. It's pleasingly asymmetrical, and the busyness and stylized design of the flowers, especially the daisy petals, is balanced with the focused and handwritten "wish" of the sentiment. The sentiment is the focal point on both cards, which pushes the busyness into the background. The bling on both cards enhances the design as well.

But the very first version of this card didn't work because the weight of the sentiment just couldn't balance with the flowers. I figured I would show the failure as a lesson of what NOT to do.

What NOT to do!

The sentiment is just too light to stand out enough on the card. My eye's just not sure what to look at because there's no clear focal point, so even though I really like the color scheme and pearls on this version, the overall design just doesn't work.

Weight matters on a card, so make sure your sentiment is heavy enough or light enough to play nicely with the other elements of the card.

Supplies
stamps: Papertrey Good Times, Beautiful Blooms 2
ink: various Hero Arts, Tim Holtz aged mahogany
paper: Papertrey white
accessories: rhinestones, pearls

Friday, August 5, 2016

Stencil Fun and a Question

Stencils are great fun, but the size and scale of most leaves little space for my preferred empty space. Consider this lovely stencil of birch trees. Even using a portion of it takes up most of the real estate on this standard 4.25" x 5.5" card.


Still, there's plenty of white with the trees themselves standing out against a dark blue and purple backdrop, and the silver edging brightens the card considerably. Filling in the stencil was a snap with the mini blending tool from Tim Holtz.

The stencil used above is plastic, but I bought a pack of stencils that ended up being kraft cardstock rather than plastic. Has anyone used these types of stencils before? How do they hold up? Does old ink from previous uses transfer to them since you can't exactly clean them? Should I seal them with something before using them?

These are the sorts of questions that keep me up at night...and also what happens when you don't read the stupid package before buying something. *sigh*

Supplies
stamps: Gina K
ink: Tim Holtz distress, Kaleidacolor vineyard 
paper: Papertrey white
accessories: birch forest stencil, mini blending tool, craft foam, glue, ruler, silver metallic marker

Wednesday, August 3, 2016

97 Percent

That's the percentage of the earth's water found in its oceans. Fortunately for us paper crafters, that leaves plenty for us to play with on our cards.

Today's background was made using the same technique as yesterday (painting Smooch on a transparency to make a print), but this time I used less Smooch and a WHOLE LOT more water, even spraying on extra with a spritzer. While the effect on yesterday's card is dense, opaque, and even lumpy, adding a lot more water evokes a light and shimmery wash.


Use your portion of the three percent of earth's water that isn't in the oceans to make some watery goodness, and if you're so moved, investigate ways you might help those who don't have access to clean drinking water get some. For instance, there's the United Methodist Committee on Relief's WASH program, or any number of other programs working around the world and close to your home.

Just a watery thought.

Supplies
stamps: Papertrey
ink: Memento Luxe black and rhubarb stalk
paper: Papertrey white, black
accessories: red rhinestone, Smooch, water, brush, transparency, water spritz bottle

Tuesday, August 2, 2016

Krafty Art

Weeks ago, I experimented with Smooch to make backgrounds. Results were mixed, but some of the experiments yielded some very cool, rather artsy results. My favorites came from a subtle blend of moonlight (almost white) and snickerdoodle, with a bare hint of light blue (the sticker with the color name is missing).


To make these backgrounds, I painted rather thick layers of Smooch (cut with just a bit of water) onto a piece of transparency. I left thick lumps of the ink wherever they happened to be, and dropped in the blue. Then, I pressed the paper into the transparency and peeled it off.

Results were unpredictable, and a lot of pretty trash was made. Some pieces looked lovely, though, with sweeping movement from the peeling.

It's fascinating to me how bad these two Smooched panels looked against a white card base. Many of the abstract art pieces from which I drew inspiration were showcased on white walls, after all, and looked marvelous. I'd have thought my panels would look soft and fresh and lovely on white, but instead they looked washed out. The kraft bases gave just enough contrast for the pearlescent shimmer to stand out.

Pretty backgrounds like this are perfect to set off sentiments as focal points, so that's what I did. Their ethereal colors lent themselves to religious themes.

I hope to have some time to stamp tomorrow. Feeling so inspired!

Supplies
stamps: Papertrey
ink: Memento Luxe rich cocoa
paper: Papertrey white, kraft
accessories: Smooch, transparency, paint brush, craft foam, glue